Galaxy’s Edge is full of unique shops and immersive experiences. There are two custom building experiences at Galaxy’s Edge perfect for Star Wars fans: Droid Depot and Savi’s Workshop. On our first trip to Galaxy’s Edge we built a custom droid at Droid Depot and immediately fell in love. After visiting Droid Depot dozens of times, building all three astromech types, researching all the personality chips, and testing a Droid Depot backpack we’re here to help you plan your own experience.
- Droid Depot Astromech Types
- Building Experience
- Droid Depot Personality Chips
- How Much Does Droid Depot Cost?
- BB, C, and R-Series Astromech Measurements
- Droid Depot Backpack Review
Droid Depot Location
Droid Depot is in Galaxy’s Edge at Disneyland Park in California or Disney’s Hollywood Studios in Florida.
Like much of Galaxy’s Edge, the signage is subtle or non-existent. Use either a paper map or the My Disney Experience App to find your way to Droid Depot.
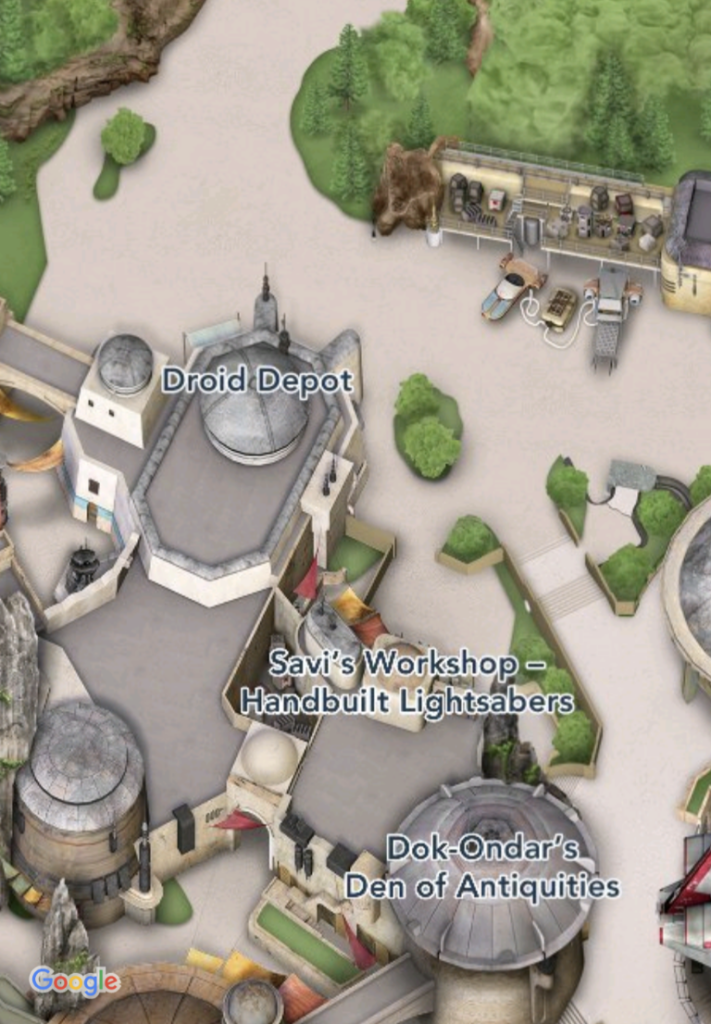
One easy way to spot Droid Depot is by finding four droids together outside a large building. Doors on either side of these large astromechs lead into Droid Depot.
Galaxy’s Edge Droid Depot Personality Chips
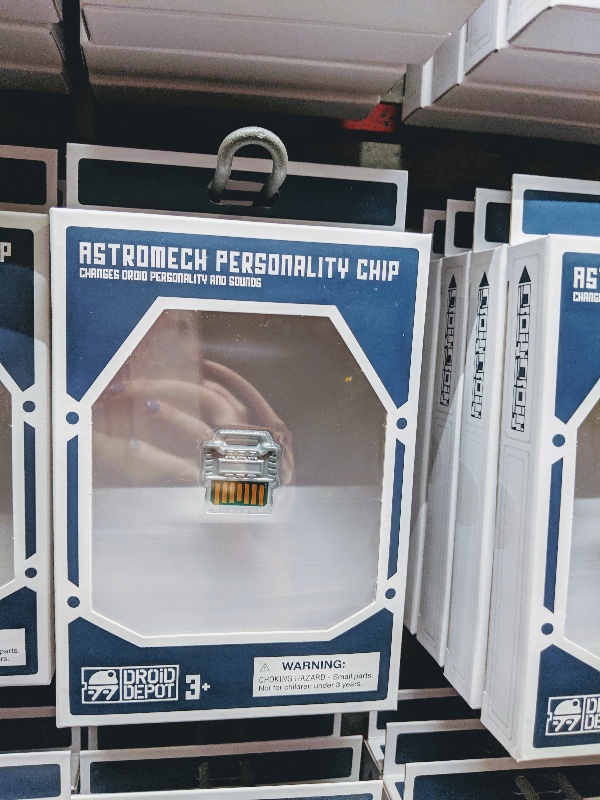
The biggest question we get about building a droid is regarding Droid Depot personality chips and how they work.
While there’s lots of online chatter about Droid Depot personality chips, finding specific and reliable information is difficult. That’s why we have purchased and tested all nine personality chips in all three droid types.
Personality chips come in a variety of colors, but the colors are only part of their defining characteristics. There are four different kinds of Droid Depot personality chips: famous droid replicas, scoundrel, First Order, and Resistance.
Famous Astromech Droid Depot Personality Chips
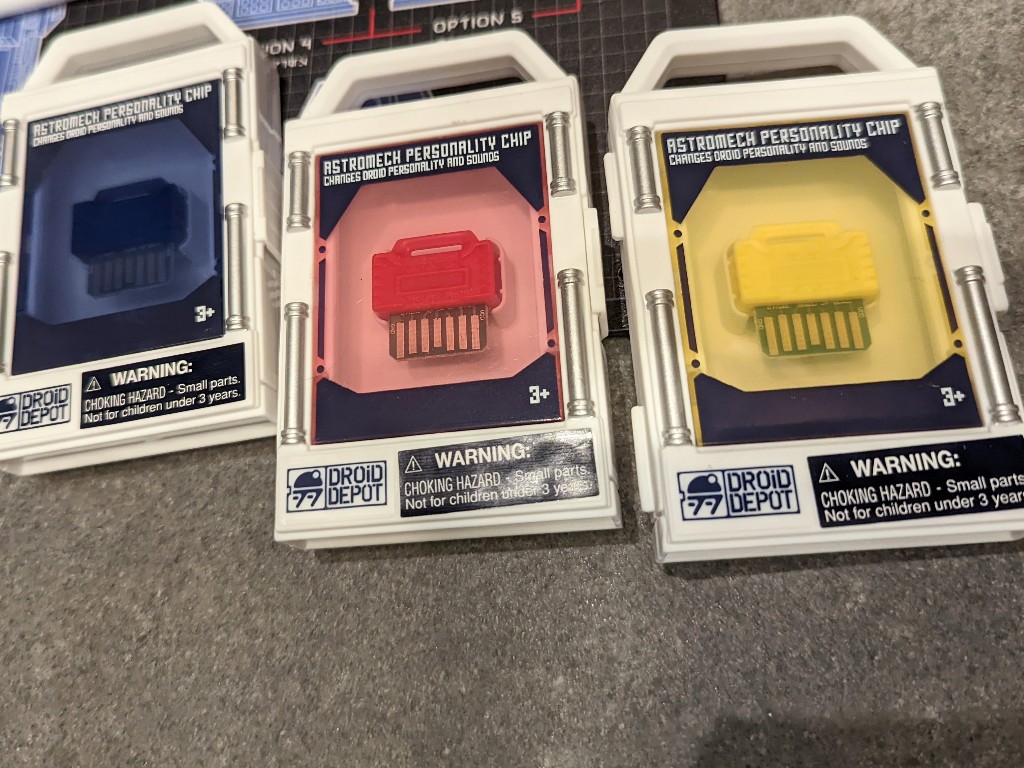
There are now nine different Droid Depot personality chips. Three chips mimic classic astromech characters: Chopper’s sassy chirps, BB-8’s beeps, and R-2’s excited noises. The remaining 6 droid depot personality chips are unique to Galaxy’s Edge.
Galaxy’s Edge Scoundrel, First Order, and Resistance Personality Chips
There are three types of Galaxy’s Edge droid personality chips: First Order, Resistance, or Scoundrel. Each type of personality chip comes in two colors.
We have all six of these Droid Depot personality chips, and they each change the droid’s sound to a unique “voice”. The chips in each type react similarly, but have different chirps and tones. Expect slight sound variations between the different color scoundrel, First Order, or Resistance chips.
Identify which kind of chip it is by looking at a symbol on the back of the personality chip box. First Order personality chips have a First Order symbol, make your droid speak in lower tones, and your droid is more likely to interact with other First Order droids or areas.
The Resistance personality chips have a Resistance symbol on the back of the box. Droids with this kind of chip are more likely to avoid anything to do with First Order and interact in areas that seem friendlier to the Resistance.
Elizabeth originally opted for Scoundrel personality chips, which have a unique symbol on the back of the box. Scoundrels look out for their own interests, showing no particular allegiance to either the First Order or the Resistance.
Our scoundrel droids get incredibly nervous in the First Order areas. They even make a kind of whimpering beep when we visit First Order Cargo. Our Scoundrel droids seem most comfortable and chatty in the main marketplace, but are not huge fans of the Resistance base either.
Droid Depot Personality Chip Price
Droid Depot personality chips cost $14.99 for each chip. Custom built droids come with a basic personality even without the purchase of an additional chip, but the chip is always an added layer of fun for us.
Do I Need A Reservation For Droid Depot?
While Droid Depot reservations are not required, they are highly recommended. Walk-up building opportunities are limited and are often unavailable during busy seasons.
Click here for Disneyland Droid Depot reservations or here for Galaxy’s Edge at Disney World.
Droid Depot Astromech Options
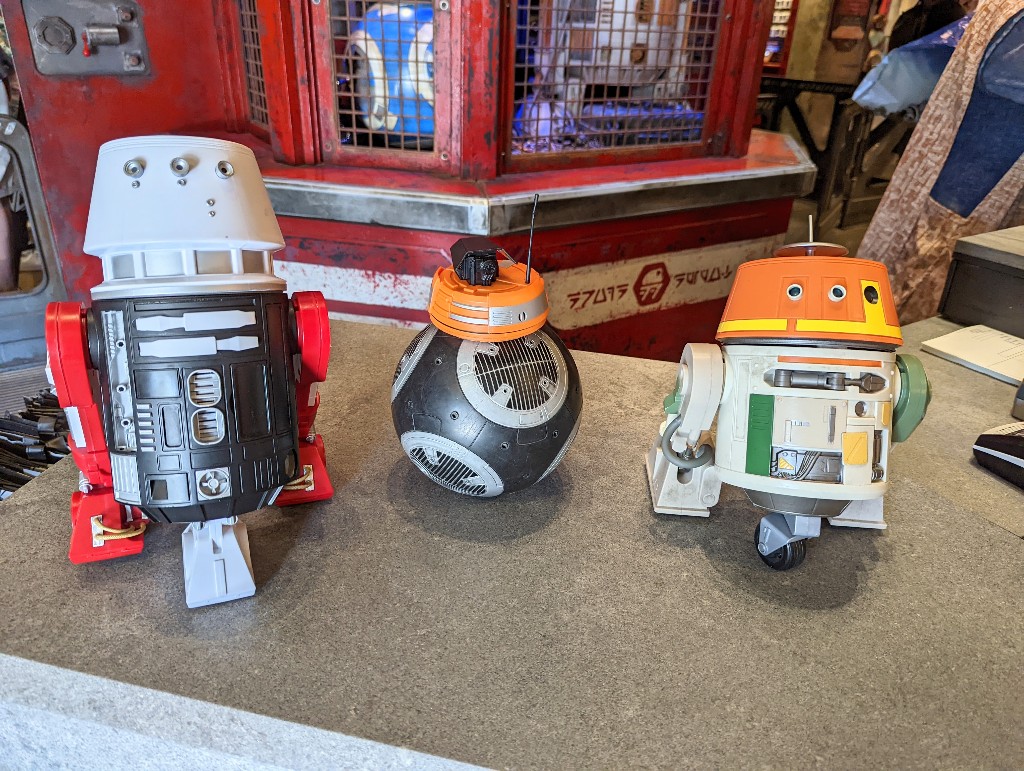
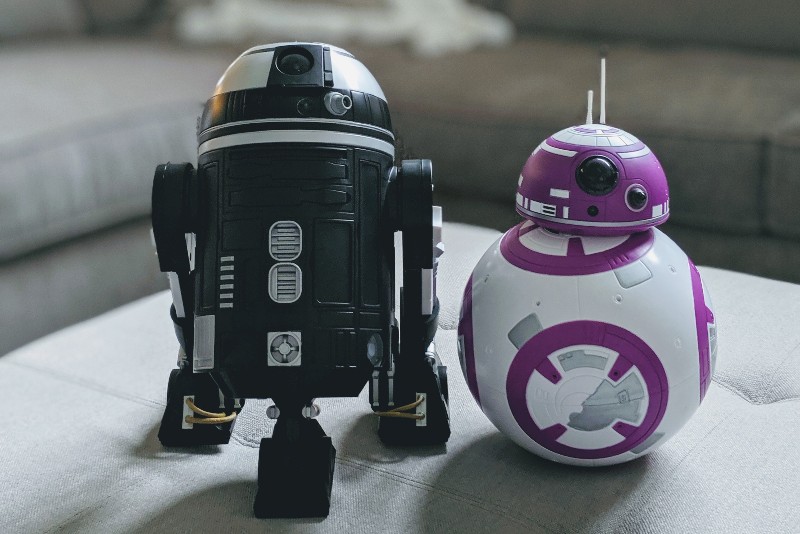
There are three different styles of Droid Depot astromechs: C, R, and BB series.
Adorable and round BB units, made famous by BB-8 in the newest Star Wars trilogy, are a popular pick at Droid Depot. R series droids, reminiscent of R2-D2, are another astromech option.
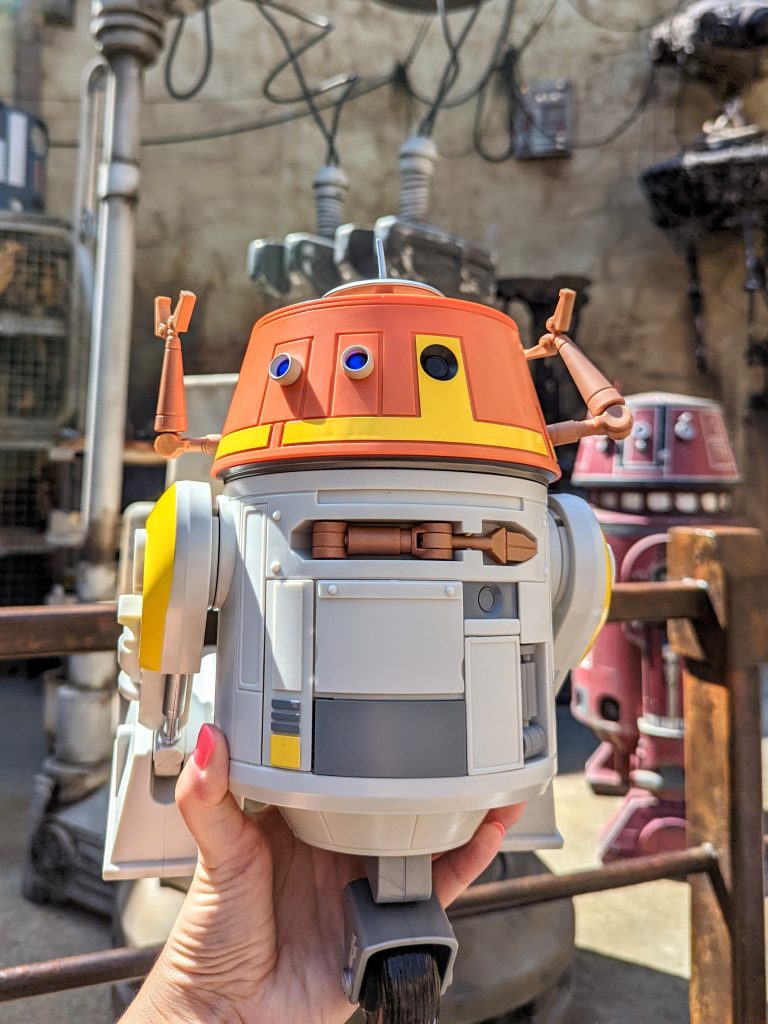
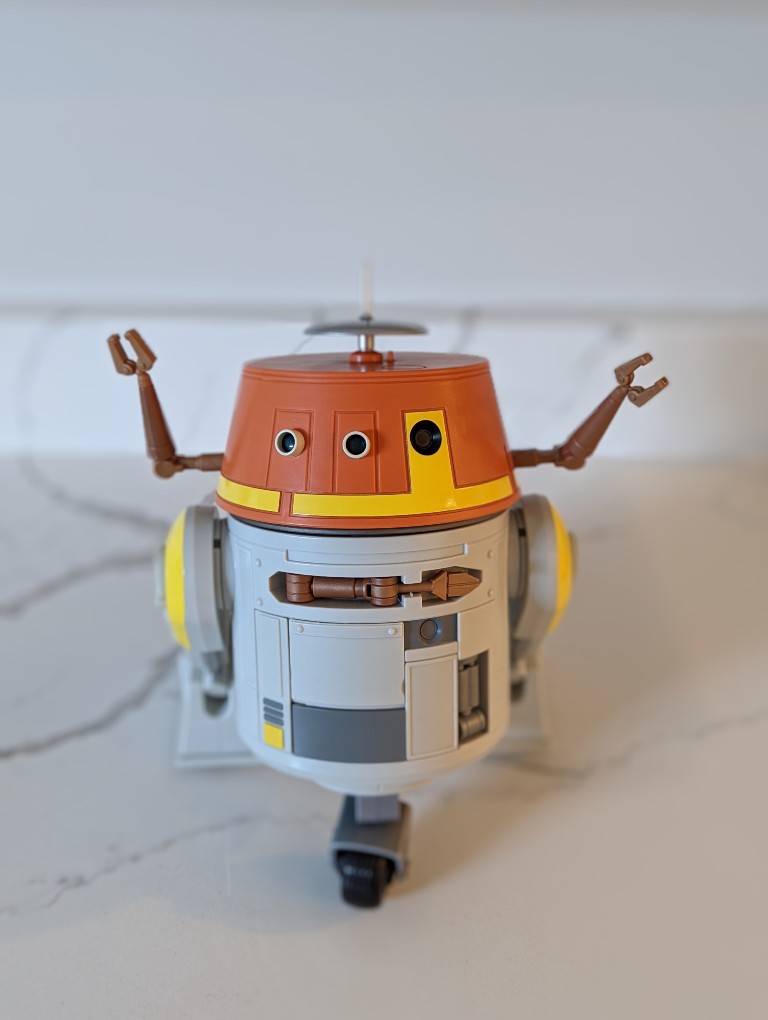
C series, the newest droid style, is especially popular with fans of Star Wars Rebels and Ahsoka. The C series droids resemble Chopper and with help from a special personality chip sounds like the argumentative droid we love.
Galaxy’s Edge Droid Depot Building Experience
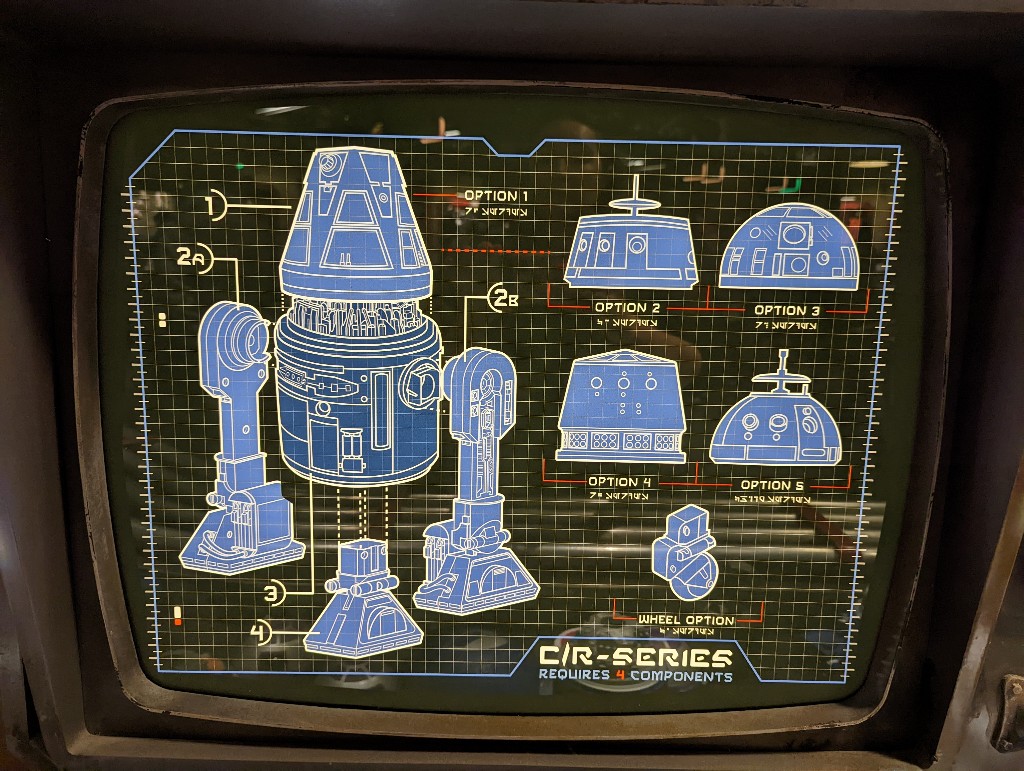
Building a droid is broken into four parts: purchasing the droid, picking out parts, building your custom droid, and finally activating your droid. Star Wars fans will enjoy each of these building steps during this immersive experience.
Step 1: Buy The Droid
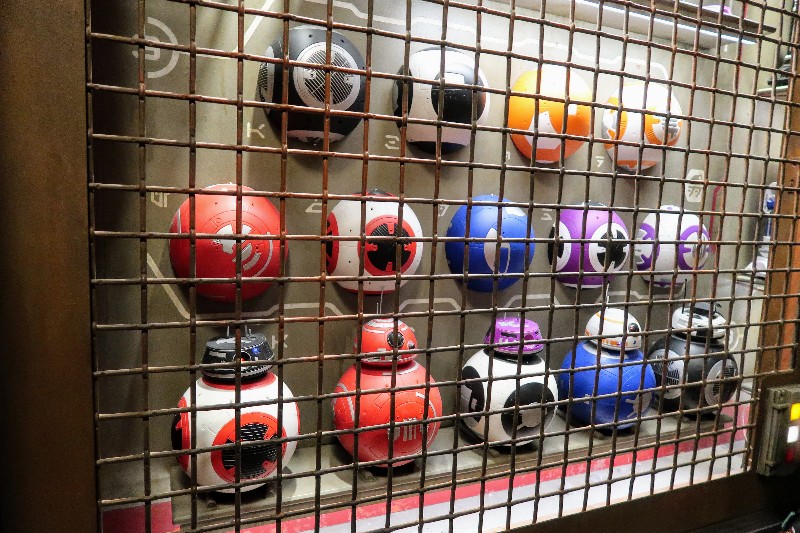
It seems a little counter-intuitive, but the first thing you do is purchase your droid. There are custom BB, C, and R series units in a multitude of colors and some varying styles.
Sample pieces for the different units are inside a cage along the queue for the register. If purchasing a personality chip, pick it out and bring it with when buying your droid. This avoids waiting in line twice and allows easy access to insert the chip while building.
On our first trip Elizabeth knew she wanted a BB unit and was hoping for one in purple. There are occasional part shortages, so before paying for our astromech we surveyed the parts conveyor belt.
Since we saw plenty of purple BB parts gliding by we completed our purchase. We’ve used this same process of peeking at the supplies before buying our droid each time.
Receive a parts basket after paying for your droid. This basket has a specific insert for each droid type indicating what parts are needed from the build station.
Step 2: Pick Out Your Droid Parts
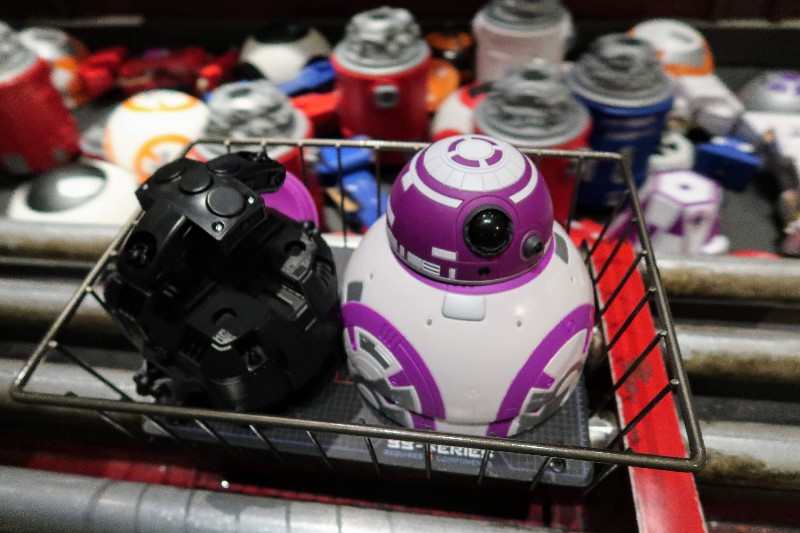
Take your droid parts basket to the parts station conveyor belt which slides past with everything you need. Paired items, like the two half spheres for BB units or legs for R and C series, are taped together so you only need to grab one.
Although Droid Depot is incredibly busy I have never felt rushed through the droid part choosing process. Grab each of the parts needed off of the conveyor belt and place them in the basket.
We usually watch the belt for a full rotation, or two, before moving on to the building process to make sure we have the parts we like best.
Step 3: Build Your Custom Droid
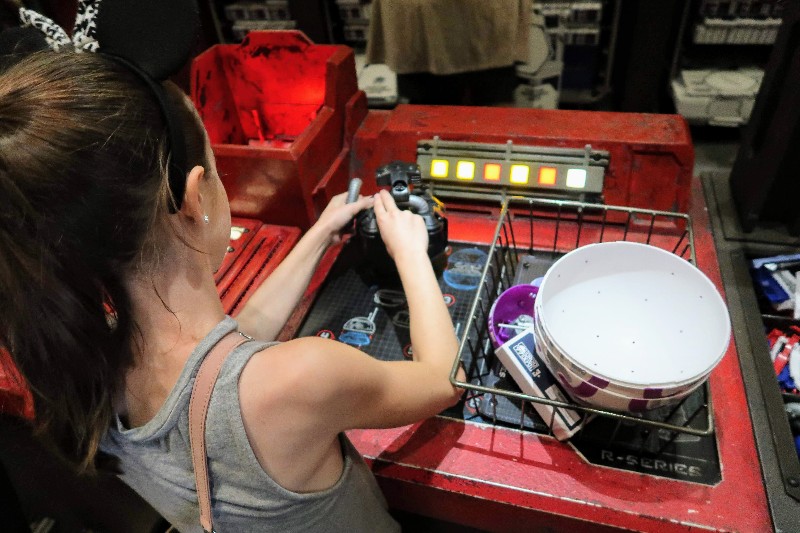
After collecting all of your droid parts in the basket, cast members direct you to a building station. Building stations have Ikea-style step-by-step instructions for assembling the droids. At first the instructions seem daunting, but after starting the process it is pretty easy.
If you get stuck during the building process, push a button and a cast member will help. In our experience, we needed very little assistance to build our BB, R and C series astromechs.
Most pieces either click together or twist closed, but a handful of pieces are screwed together. Find electric screwdrivers attached to a cable at each droid building station.
Pro tip: If you have purchased a personality chip for your BB style droid it is best to install it during assembly. BB personality chips are inserted into the motivator which is inside the ball casing. Personality chip access is easier on R and C series droids with an easy-open panel on the front.
Step 4: Activate Your Custom Droid
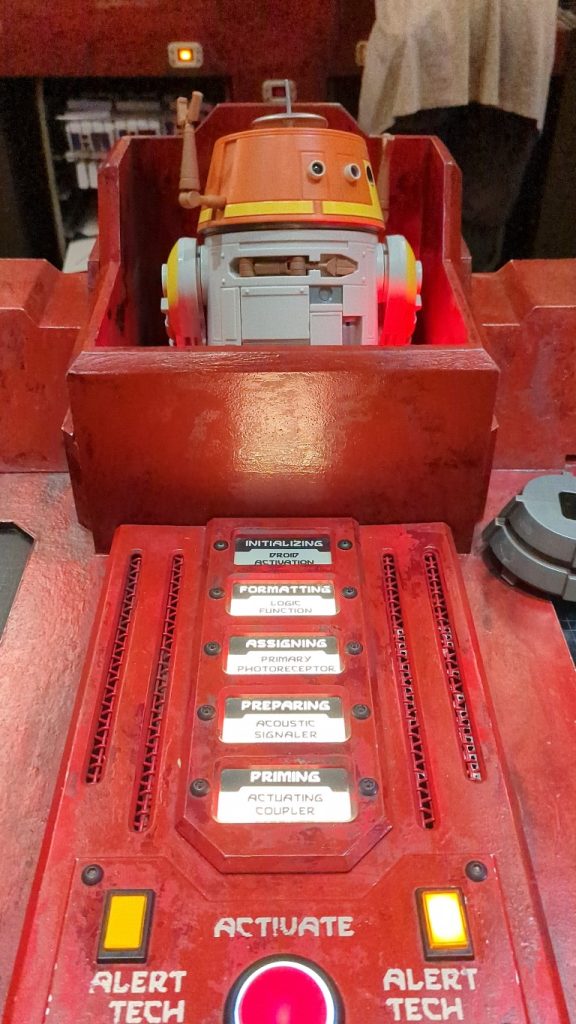
After building your droid it is finally time to activate it. A technician places your droid in an activation pod where a basic controller is paired to your droid. The remote control is pretty basic with simple buttons to move the droid and make it “talk”.
Once the pairing is done, you push a button to complete activation of the droid. After a few seconds your custom built droid comes to life, and it is time to box it up.
Galaxy’s Edge Droid Depot provides a cardboard carrying box as part of your purchase price. The cardboard box has openings where you can see your droid interact all around Galaxy’s Edge.
How Much Does A Droid Depot Astromech Cost?
The price to build a droid is different depending on where you build it, but each of the droids are the same price by location.
Currently BB, R, and C series droids sell for $119.99 each at Disney World. Disneyland Droid Depot only charges $99.99 per droid. Additional accessories vary in price.
Unfortunately, there are no Annual Pass or Magic Key Pass discounts for Droid Depot.
Using Your Custom Droid In Galaxy’s Edge
Keep Your Droid Contained
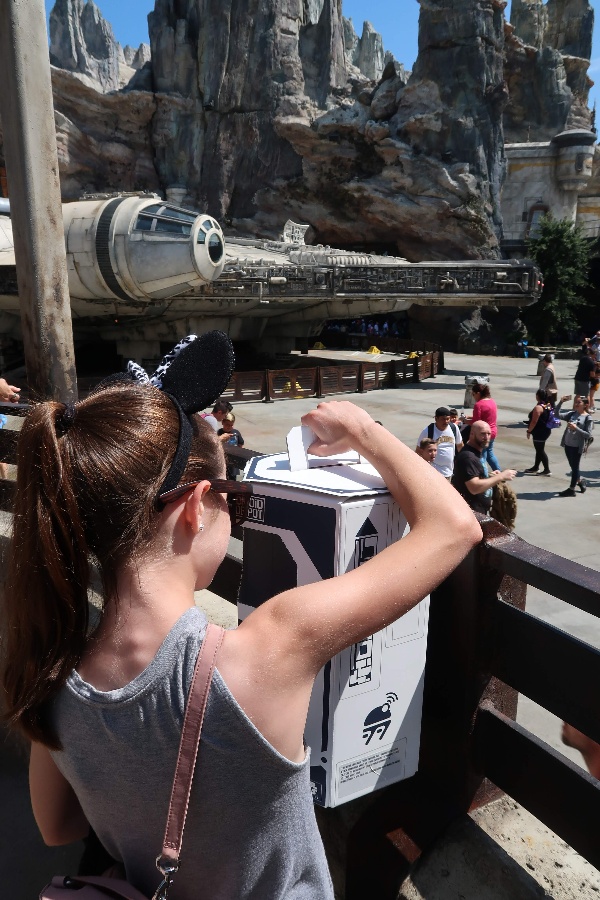
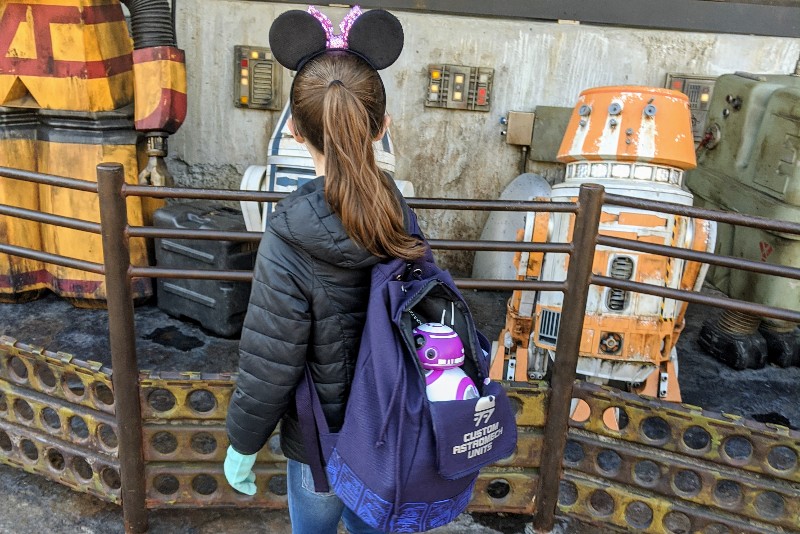
Droid Depot custom droids cannot roll through Galaxy’s Edge, except for a designated play area around the depot. Droids must be inside the carrying box provided, the special Droid Depot backpack available for purchase, or otherwise secured.
The Droid Depot carrying box is an okay way to transport a BB, R, or C unit, especially if the specialty backpacks are sold out. The openings make it easy to see when our droid is talking or moving in response to something in Galaxy’s Edge.
However, the handle of the cardboard box is really uncomfortable. The cardboard feels sharp after carrying it for a while.
Part way into our first day at Galaxy’s Edge I found a low tech way to make the handle more comfortable. I simply wrapped a couple of napkins around the handle to cushion the rough edge. Although kind of ugly, it worked really well.
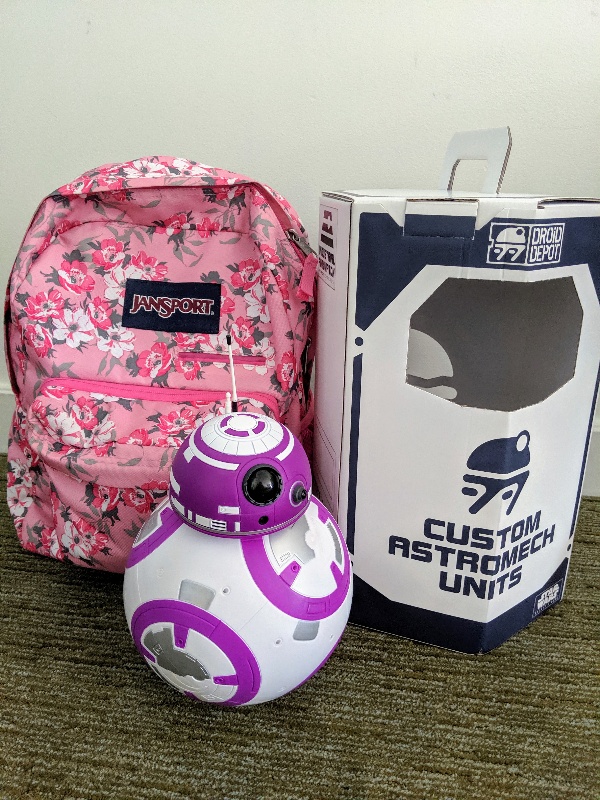
We also tried using a traditional backpack to walk BB through Galaxy’s Edge. The regular backpack was decidedly worse than using the provided carrying box from Droid Depot for BB. The BB unit head kept getting knocked off inside the Jansport backpack, and you could not tell when it was interacting with prompts inside Galaxy’s Edge.
Not surprisingly, the specialty Droid Depot backpacks are the most comfortable way to carry your astromech around Galaxy’s Edge.
The Droid Interactions Are Random
We always enjoy how our droids seem to chirp and move as we explore Galaxy’s Edge. At first we thought we knew when and where our droids would interact, but the longer we spend in Galaxy’s Edge the more we discover the interactions are not completely reproducible.
Sometimes we would bring BB-5 to a place where she would become very animated, but the next time we walked past nothing happened. At first I was a little disappointed by this lack of consistency, but then I began to appreciate that this randomness made the experience feel more authentic.
Droid Depot Controller
All three types of droids use the same basic controller. Bluetooth technology pairs the control and droid during the activation step.
Use the control pad to move the droids forward, back, side to side, and make noises. This basic pad lets even the youngest Star Wars fans play with their droid long after the build process is complete.
Disney previously released a mobile app for Droid Depot which had some fun experiences, but the app hasn’t been updated. I recently tried to download the app on a new phone and couldn’t because it isn’t optimized for my current operating system. This is really disappointing because we liked the mobile app control better than the basic one that comes with the droids.
Droid Depot Astromech Sizes And Weights
When building our first droid we were traveling with carry-on luggage only. This meant it was especially important to know how much space I needed to bring our droid home.
Unfortunately, I could not find any measurements for the custom droids before our first trip to Galaxy’s Edge Droid Depot. To save you from the same fate here’s measurements for each Droid Depot astromech type.
BB Unit Astromech Measurements
Our Droid Depot BB unit has the following rough measurements: 10 inches tall (12 inches tall with antenna) by 7 inches wide by 7 inches deep, or about 25 by 18 by 18 cm. She easily fit inside a standard size backpack with room to spare. Our BB unit weighs about 3.5 pounds (1.6 kg).
R Unit Astromech Measurements
Droid Depot R units have different measurements which vary depending on whether the legs are folded together or folded out.
The R astromech dimensions when unfolded are 12 inches tall by 8.5 inches wide by 8 inches deep, or about 30 by 20 by 22 cm.
When the legs are folded together the dimensions change to 12.5 inches tall by 8.5 inches wide by 6.5 inches deep, or about 32 by 20 by 17 cm. Our R series droid weighs in around 3.2 pounds (1.4 kg).
C Series Astromech Measurements
As a huge Star Wars Rebels fan, Elizabeth couldn’t wait to build a Chopper-like droid complete with menacing arms and challenging personality. Like Droid Depot R units, C series astromechs have different measurements depending on whether the legs are folded together or folded out.
The C astromech dimensions when unfolded are roughly 11.75 inches tall by 8.25 inches wide by 6.25 inches deep, or about 30 by 20 by 16 cm. Our C series droid head is the medium height option so the tallest one would add on a couple inches in height.
When the legs are folded together the dimensions change to 12 inches tall by 8.25 inches wide by 6 inches deep, or about 30 by 20 by 15 cm. Our C series droid weighs in around 3 pounds (1.4 kg).
Removing the C series antenna takes about an inch or 2.5 cm off the height for both folded and unfolded measurements.
Droid Depot Box Measurements
Included in the price of the droid is a basic cardboard carrying box. This box is a tall hexagon shape. Rough measurements for the Droid Depot box are 10.75 inches wide by 10.75 inches deep by 18 inches tall including handle or 27 by 27 by 46 cm.
Droid Depot Backpack
The best way to transport your custom Galaxy’s Edge astromech is in a Droid Depot backpack. These specially designed backpacks work for R, C, and BB astromechs and have some clever features.
When using a regular backpack we had an issue with our BB unit’s head getting knocked off. The Droid Depot backpacks have a special chain that clips to the back of the BB head. This chain keeps the head safe in case the magnets get misaligned.
The bottom of the backpack has thick foam with two different cut outs to cushion the droids. One section perfectly holds the rounded shape of the BB unit while the other supports the legs of the R and C series units. We tested all three of our droids, and the same backpack held them all equally well.
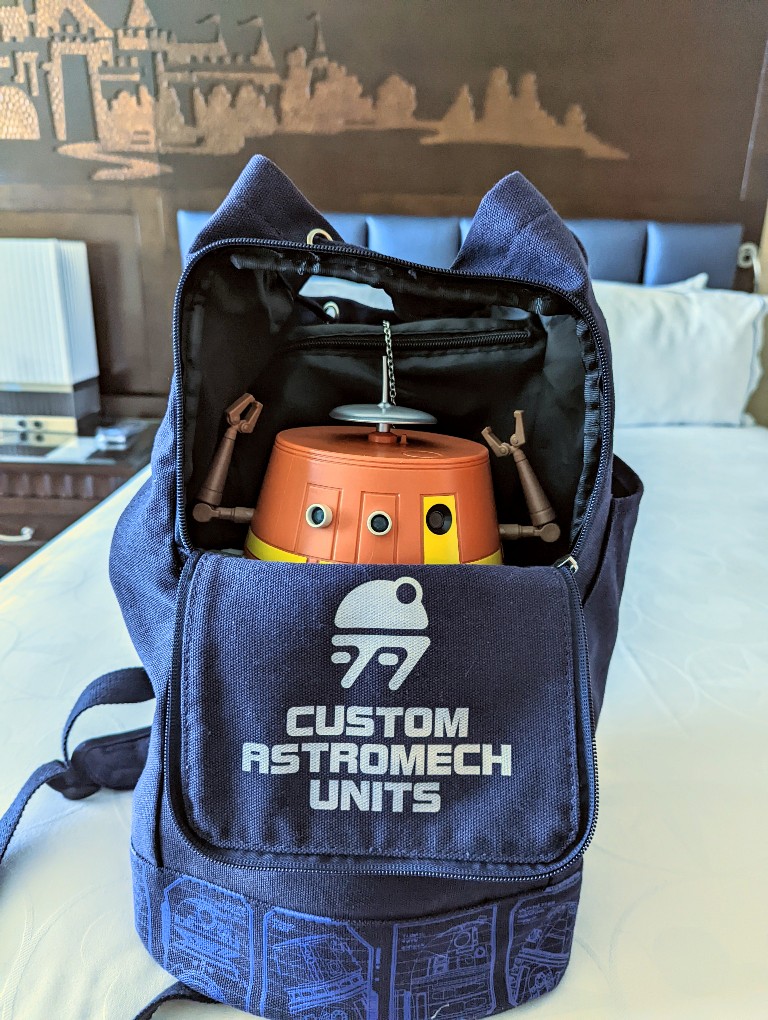
A pocket on the side of the backpack easily holds your droid depot remote. The front of the backpack zippers open, and a magnet keeps the flap open. This design is perfect to let your astromech peek out.
Another great feature of the Droid Depot backpacks are padded, adjustable straps for comfort. My petite daughter was able to carry her droid around Galaxy’s Edge for hours without any complaints.
We’ve taken our astromechs around Galaxy’s Edge in a regular backpack, the Droid Depot backpack, and in the original box. Of all of these options, the Droid Depot backpack is the most functional and comfortable option.
Galaxy’s Edge Droid Depot Final Thoughts
Going into our first Galaxy’s Edge experience I was a little skeptical about building a custom droid at Droid Depot. However, having our own special droid makes our Galaxy’s Edge visits more fun. In fact, we enjoyed our first droid so much that we built all three styles.
The process to build a custom droid is simple and exciting. Elizabeth loves all three of her unique Droid Depot astromechs and has enjoyed bringing them back to Galaxy’s Edge plus playing with them at home.
Pin it for later: